AVPro MXNet 10G
Ultra-low latency HDMI 2.0 4K60 4:4:4 video distribution featuring lossless audio, control signal distribution over 10G ethernet using SDVoE.
Shop
This guide will walk you through the Getting Started Wizard for any model of Netgate PfSense Firewall Routers.
For this demonstration, we are using a Netgate SG3100 Firewall Router with the IP subnet 192.168.101.0/24, however, this guide can be applied to any Netgate Firewall Router model and any IP subnet schema that you choose. If you wish to view the Getting Started and Other Instructions on the Netgate Website (we recommend that you do), you can find that here:
https://docs.netgate.com/pfsense/en/latest/solutions/sg-3100/getting-started.html
Note: Blackwire recommends that you have a basic understanding of and experience with TCP/IP Networking, IP Addressing and Subnetting, DNS, DHCP, Routers and Switches, and how to make basic adjustments to the Network Settings on your PC or Mac OS Computer and various IoT Devices before proceeding with this guide.
Some Notes About IP Addressing, Subnets, and DNS:
The Netgate Firewall Router will have a default IP Address of 192.168.1.1. Blackwire does not recommend using this or any of the other most common default IP addresses for any of your networks (ie. 192.168.0.1, 192.168.1.1, 10.0.0.1, 10.1.1.1, etc). Because these are the most common IP Addresses out there, you are very likely to run into an IP conflict while providing remote support.
Blackwire recommends choosing a different IP address for each new site, for example, 192.168.10.1 for your first project, 192.168.11.1 for your next project, 192.168.12.1, etc. This will give you 253 IP subnets before you have to re-use a subnet again. If you have more than 253 projects, or you use VLANs and multiple subnets on your projects, you are going to run out of unique IP subnets pretty quickly. If this is the case, you should consider using Class A IP ranges, ie 10.10.10.1, 10.10.11.1, etc. With Class A subnetting, you will have almost 17 million subnets available for your client sites before you have the chance of an IP conflict during remote support.
Pro Tip: In networking, we call the .0 address the “Subnet ID”, and the .255 address the “Broadcast Address”. This leaves you with 254 IP addresses on every subnet with the most common subnet mask being 255.255.255.0, also notated as /24. For example, if your router’s IP address is 192.168.101.1, and your subnet mask is 255.255.255.0, your subnet ID would be 192.168.101.0/24.
To get started with your new Netgate pfSense Firewall Router, connect the WAN port to your internet modem, connect the LAN 1 port to your computer or a switch with an ethernet cable, and turn it on. Set your computer to DHCP, turn WiFi off, and allow several minutes for the new router to boot up.
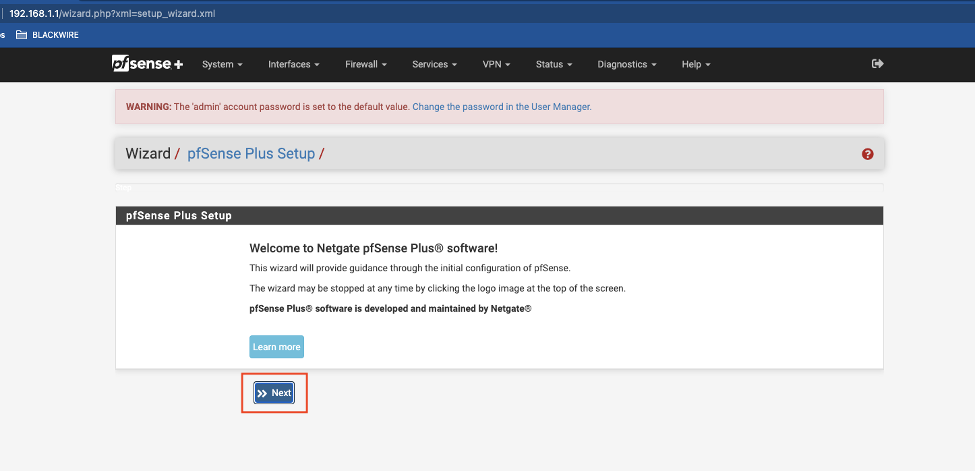
Once your computer has a DHCP address from the Netgate on the 192.168.1.0/24 subnet, open a web browser and type in https://192.168.1.1 to access the Web Interface of the Netgate pfSense Firewall Router.
Log in to the new Netgate with the username admin and the password pfsense

Once you log in, you will be greeted with the Welcome screen. Hit Next to begin the Setup Wizard:
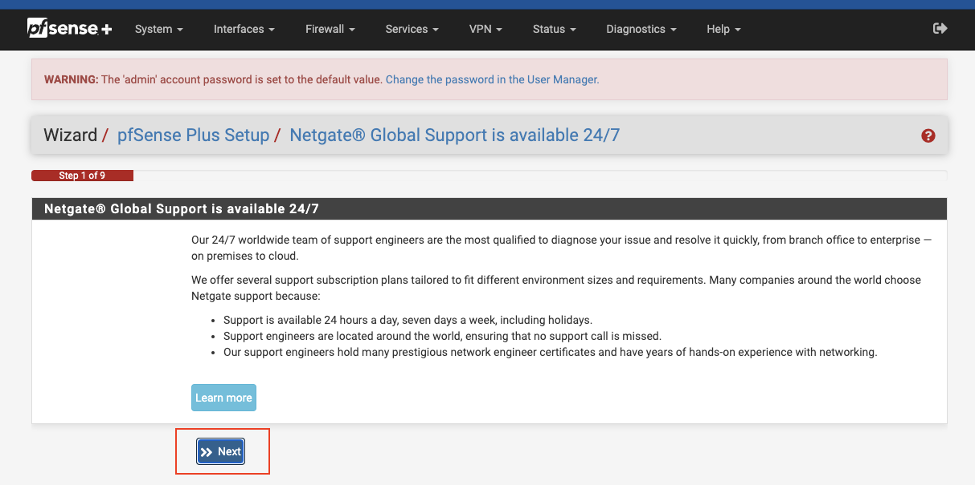
Hit Next again to bypass the support info screen:
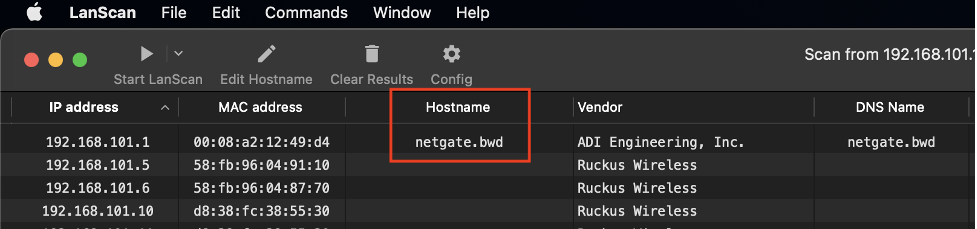
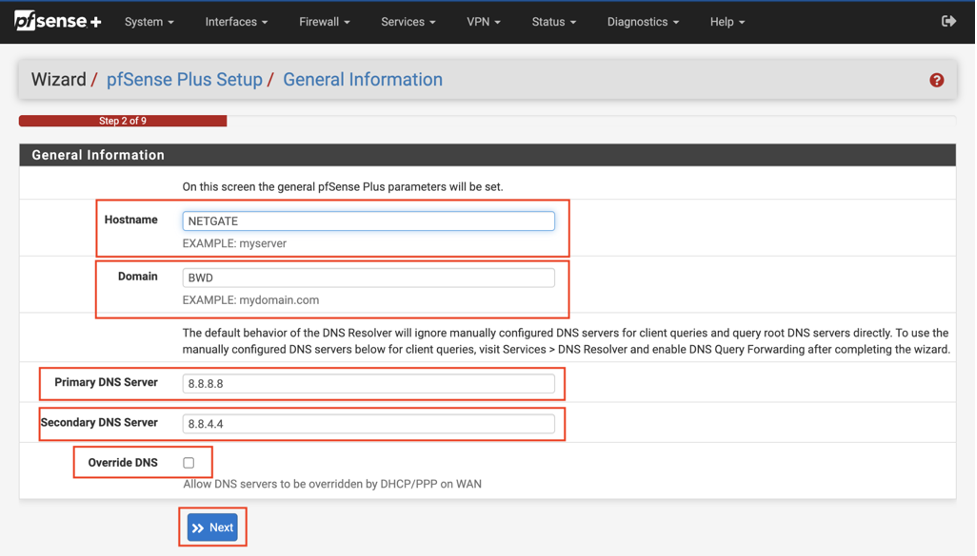
The next screen is for DNS Info. Here, you can give your firewall a hostname and choose a domain. For this demonstration, we are naming our firewall NETGATE, and using BWD as our domain name. We recommend choosing a naming convention that identifies the device, your company, and the site. This way, when you run a network scan or scan your network with Domotz or OVRC, you can easily identify your devices both locally and remotely:
Unless you are proficient with DNS and have your own specific settings, use the Google DNS Servers 8.8.8.8 and 8.8.4.4. These are the largest, fastest, most reliable DNS servers in the world, and this setup will work anywhere, regardless of your location or ISP.
Uncheck the box for Override DNS. Click Next to continue.
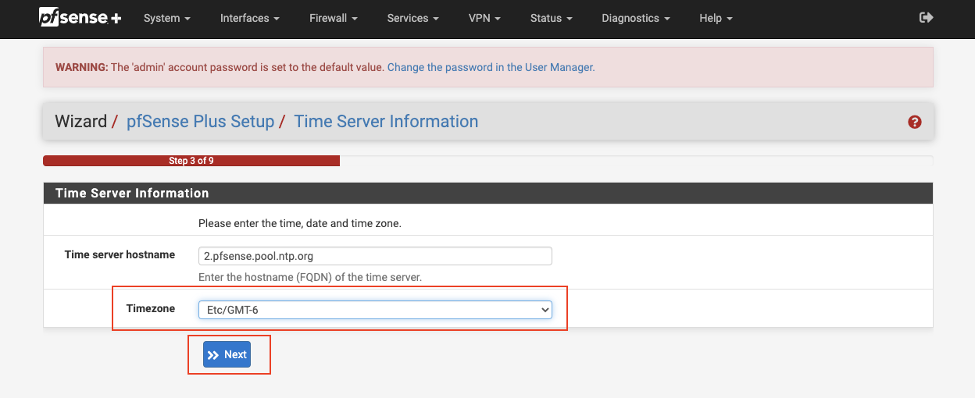
The next screen is for Date and Time info. You can use the default NTP servers, so you do not need to do anything for the Time server hostname, but you do need to select your timezone. Select your timezone and hit Next to continue
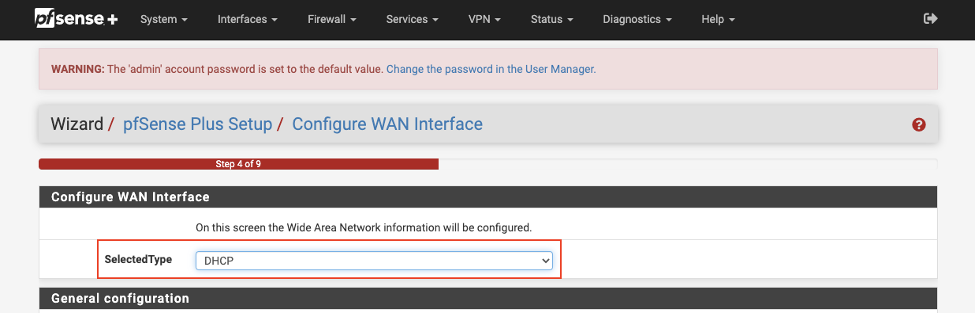
The next screen is to configure the WAN Interface. This is where you will configure your local ISP info so that the firewall router can connect to the internet. In most cases, this will be DHCP and you will not have to configure anything.
If you are setting up your network with a Static IP or PPPoE, select that option here and scroll down to fill out the correct info for your specific ISP. Because this info varies from provider to provider, we can not cover every possible setup in this guide. If you need assistance with a Static IP or PPPoE setup, please contact the BlackWire support team via chat or on the Contact Us page.
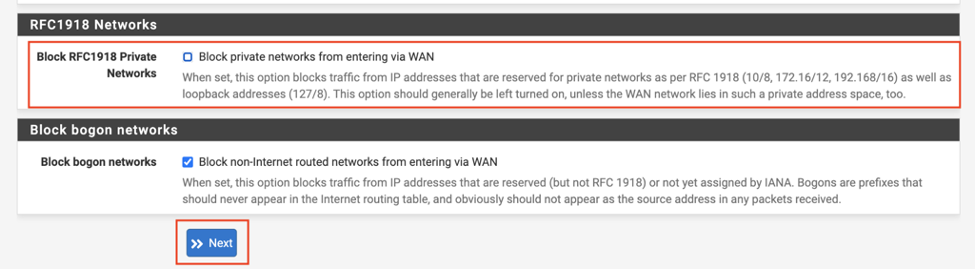
By default, the Netgate PFSense router will block IP addresses in the private range (ie. 10.1.1.1, 172.16.0.1, 192.168.0.1), so if you are setting this up at your office, or behind a modem/router that is not in Bridge Mode, you will need to uncheck the box at the bottom of this screen that says “Block private networks from entering via WAN”
Scroll down to the bottom of this screen and hit Next to continue.
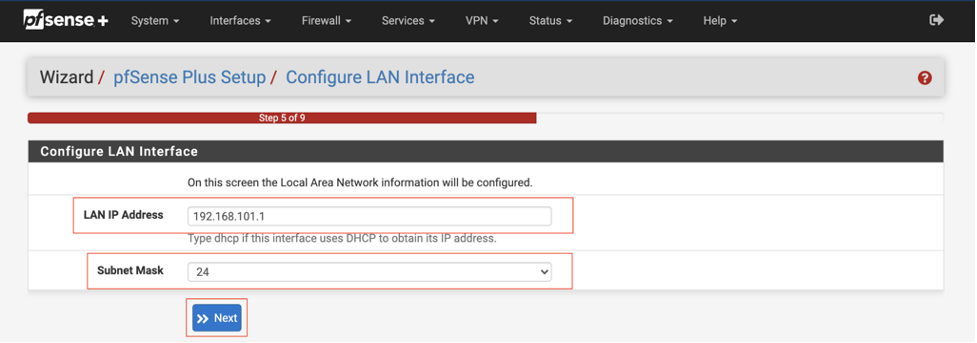
The next screen is to configure the LAN Interface. This is where you will choose your local IP address. For our demonstration network, we are setting the LAN IP Address to 192.168.101.1, with a subnet mask of /24 (/24 is the same as 255.255.255.0). This will be the IP address of your firewall router, and the default gateway for all of your LAN devices.
Hit Next to continue.
On the next screen, choose a new Admin Password. Make sure you remember this password, you will need it to log back into the Netgate pfSense Firewall Router in just a few moments.

Pro Tip: Choose a site-unique password for all of your network edge devices. If your company name is Performance AV, and you like to use performance1234! as the password for all of your devices, this is usually fine for devices inside your network. However, your firewall faces the Internet! So it is very important that you choose a site-unique password for all of your edge devices: the router, the wifi network, an NVR with ports open to the WAN, etc. Blackwire recommends a password with 14 characters or more.
You can use https://passwordsgenerator.net/ to create random, site unique passwords, and you can use the How Secure Is My Password website to see how long it would take a computer to guess your password (brute force attack).
On the next screen, hit the Reload button to finalize your setup. This will reload the router, but will not do a full reboot, it should only take about 10-15 seconds.

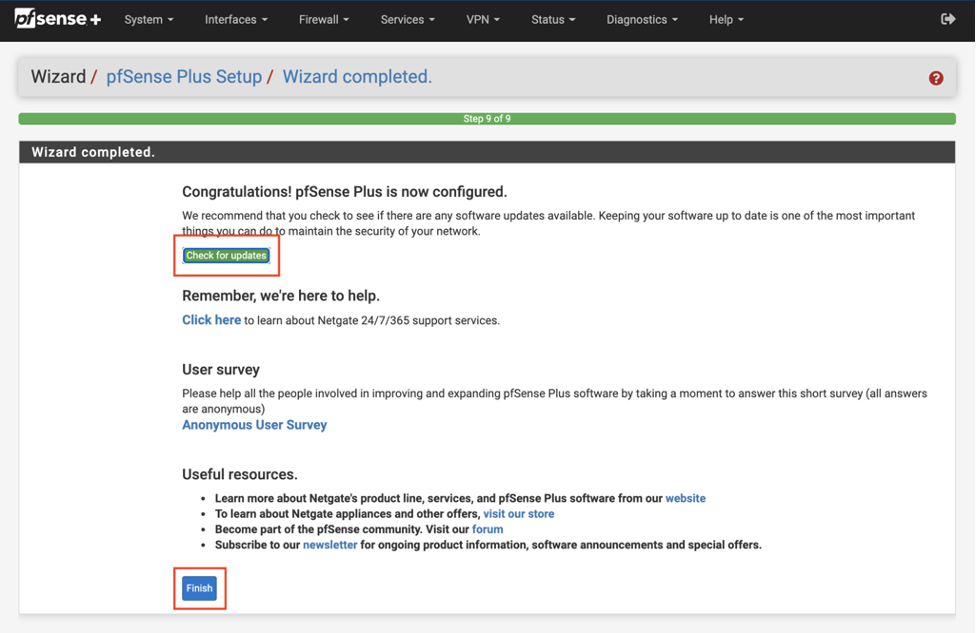
Congratulations! You just finished the Getting Started Wizard for your first Netgate pfSense Firewall Router.
Make sure to hit the Check for updates button to make sure your firewall firmware is up to date. At the time of this guide (July 2021), the highest recommended firmware is version 21.05
Hit the Finish button to continue.
Click here to register an account
Registration is easy and should only take a minute to fill out the form.