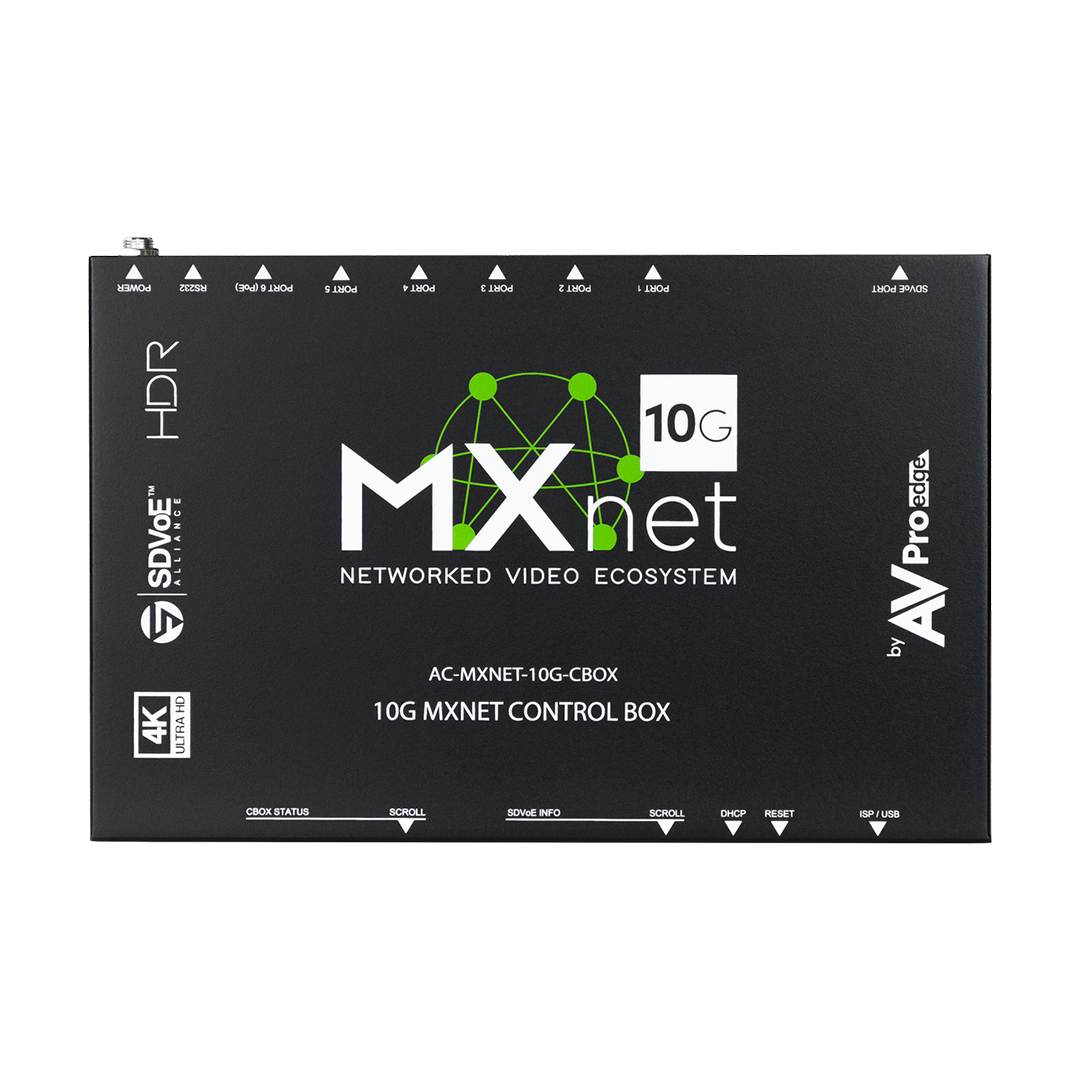
AVPro MXNet 10G
Ultra-low latency HDMI 2.0 4K60 4:4:4 video distribution featuring lossless audio, control signal distribution over 10G ethernet using SDVoE.
Shop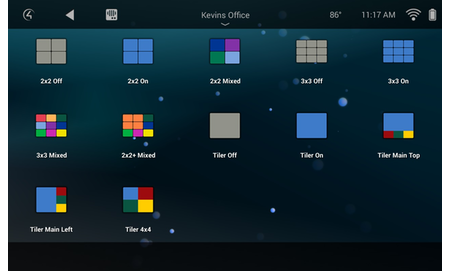
The BlackWire VideoWall & Tiler Experience buttons are designed to give you easy to use icons on the T3 and mobile Control4 interfaces.
Each instance of this driver will create 1 single icon that you can assign on a touch screen
Once you have installed the driver enter the BlackWire License key and then assign the Mode.

Our recommended use is to have a few icons under watch and label them for the sources. Meaning You have a 2×2 lay out that says Video Wall ON. and a 2×2 version that uses the mixed icon to show that its now showing 4 different images. You can play around with what works best for your install and client.
Install multiple copies of the driver (paste the same license key into each). To do this you will select the mode first (Easy 2×2, 3×3, etc) This will make the driver populate property boxes for each of the available icons.
On the each copy of the driver click the drop down for each icon option IE 2×2 Off, 2×2 On, 2×2 multi, and hide all of them except for the one you want.
In the example below the icon you see is what you would have on the touch screen with 2×2 On set to show and 2×2 off and 2×2 multi set to Hide.


We need a few things to get this working.
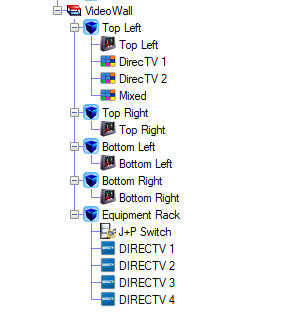
The example to the right has the TerminalServer driver in each room. This driver is a TV driver as well so if you are doing CEC control there is no need to do custom programming against a normal tv driver.
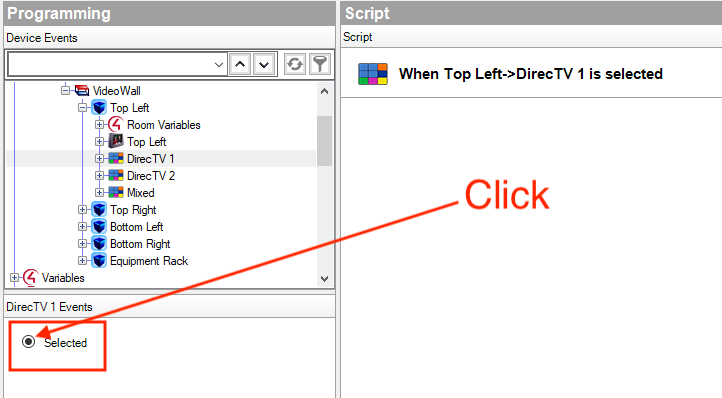
Video Wall Button Programming:
To get started you will go to the Programming tab in composer. Click on the BlackWire Video Wall Icon on the left under Device Events and then click the Selected option.
Adding Video Wall Change Commands:
When you click on the J+P TerminalServer driver under programming actions it can be confusing since you see TV programming commands. Scroll all the way down in composer.
To the Right of this is what you see at the bottom.
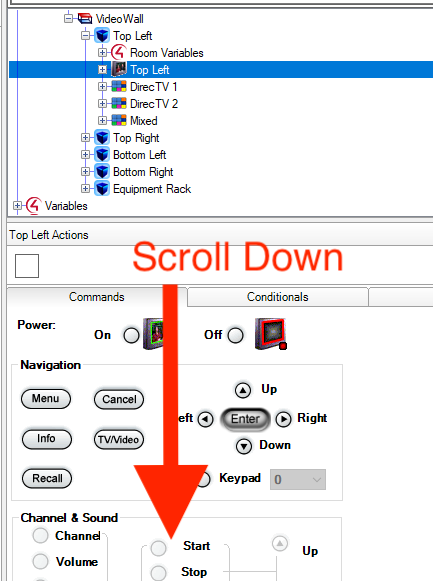
Bottom of Terminal Services Driver:
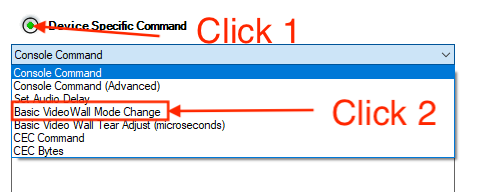
Click the Device Specific Command circle then click on the drop down box and select Basic VideoWall Mode Change
You will send a command through each copy of the terminal services driver to each receiver. IE 4 tvs in a video wall means 4 copies of the driver.

Adding Your Programming:
Now that you understand how to send commands using the J+P Terminal Server driver you will use them in combination with standard composer room source selection.
This example would have DirecTV 1 being displayed stretched across all 4 displays
The BlackWire Video Wall Icon would be set to show 2×2 On

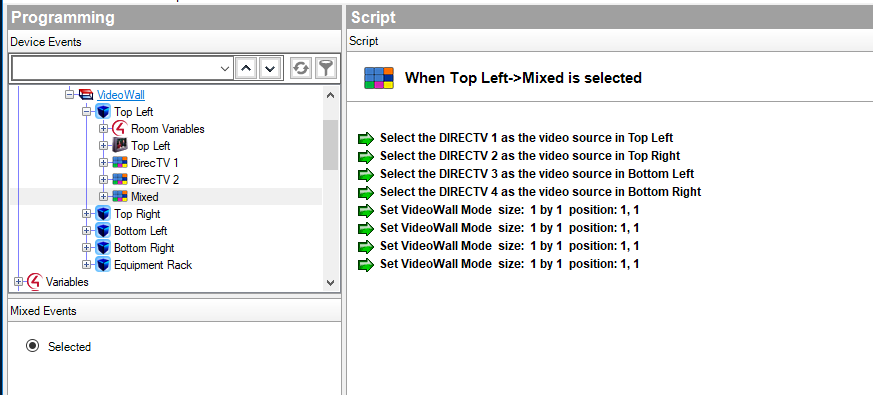
This example has each display watching a different DirecTV box and also the video wall being turned off.
Setting the video wall to all 1’s means that it is disabled.
The BlackWire Video Wall Icon would be set to show 2×2 Multi
Click here to register an account
Registration is easy and should only take a minute to fill out the form.